
Today we continue with part 2 of Fundamentals of Low Light. You can read part 1 here.
How do I use this thing, anyway?
Low-light techniques are not always intuitive, at least as far as sound tactics are concerned. What may work well for looking for a lost cat or set of car keys in the dead of night is not a wise mode of operation when looking for a meth addled property reallocation specialist who is stabby crazy. A few bad habits to avoid are constant-on, telegraphing and improper beam placement.
Constant-on or “long light†is exactly what it sounds like, moving through an environment with the light on, basically drawing any and all attention to your location. Telegraphing is usually a symptom of working with the light in a constant-on in which we focus the beam on where we are headed and leave it there. Not only does this tell anyone watching where you are headed, but it causes you to neglect looking at anything outside of that beam. Beam placement is the improper or inefficient use of your lights hot spot. This can be as simple as lighting the floor without any reason, to illuminating a threat’s torso or hands when the beam should be burning into their eyes. This is just a quick explanation of bad habits, but I think you can imagine even more reasons not to do any of the above if it can be helped.
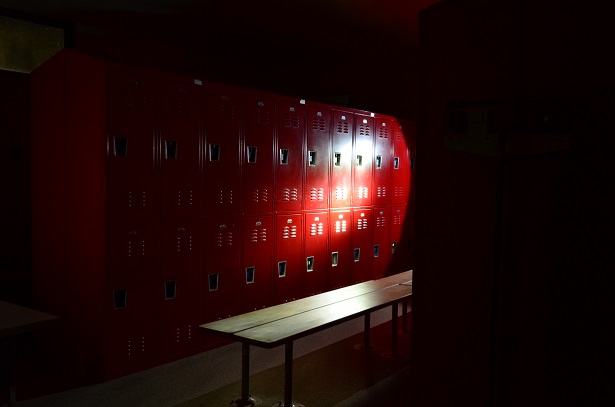
Telegraphing, photo by SD
For the purposes of use with or on a weapon, the light has three general uses; Navigation, Searching and Control.
Navigation is pretty straight forward right? Yes and no. We want to, if possible, navigate with the lowest possible amount of light to preserve what night vision we have and not announce the general direction of our location to the world.  We also want to avoid using the light in constant-on as much as possible and keep the beam directed in such a way that it helps to mask both our position and our intended destination.
It’s not nearly as hard as it sounds. A simple technique of flashing (or strobing if you prefer) the light to get a snapshot of your environment, move, change the direction of the beam (even if slightly) and then flash again for another snapshot. In an indoor environment, you can splash light ceilings or high on walls, which greatly illuminates the room with the reflected light and puts the beam in a place that makes someone guessing your intentions very difficult. Its important to only use the light when you actually need it.   If forced to use a weapon mounted light due to lack of a handheld, be conscious of your muzzle.
Searching with a light is done when there is a specific area, object or person(s) you want to locate. It can be done in the same manner as navigation, using the lowest light possible but this limits the depth of area your light will illuminate where your noun can be seen. It’s best in most circumstances to use the same flashing technique as with navigation on a higher lumen output. There is a natural desire to run a long light when searching, just as there is a natural desire to use more light than we may need to navigate. You can blame our poorly evolved nocturnal abilities for that (see part 1).
As often as possible, use objects to splash your light (ceilings and high on walls, mirrors or other reflective surfaces). In enclosed linear spaces like hallways or alleys, light disciple is crucial to avoid too much telegraphing, though if there is a threat somewhere along the hall or alley, they will know you are there. Proper flashing with seemingly random beam direction will help mask exactly where. This is another situation where a handheld light is more versatile than a weapon mounted light; it allows you to keep your weapon ready while not slaved to where the light and your eyes go. Just as with navigation, it’s important to only use the light when you actually need it.
Light Past Cover – Hallway, photo by SD
Control is about confrontation of a threat, and using your light in concert with your weapon if the situation calls for it. Contact with a known or possible threat requires as much light as possible, and all of it directly in their face. As little as 60 lumens is enough to remove a person’s visual horizon in low-light conditions, so obviously 170 or more is going to work even better. The residual light is usually more than enough to illuminate their hands so you can visually clear them and most importantly, since it is likely in many situations that you will have your light out before your weapon, the startle effect of your maximum brightness in their face buys you time to draw your weapon.
With light control, verbal commands may initially have more effect at gaining initial compliance as your bad guy can’t see you, or see you very well. They may turn their head away or shield their eyes from the light but this is the functional equivalent of being blinded by the light as they still can’t actually see you. It’s important that whatever action you intend to take, you take it soon after you get light control.
I have seen in numerous low-light situations both in training and on the street where inaction after initial light control let the threat form a plan and act on it. Sometimes this was to flee; sometimes it was to rush the light. Of course if there is a need for immediate force, working to a weapon/light grip as soon as possible is important. Another thing to be conscious of is to avoid talking with the light. If you are issuing commands, such as an order to move here or there, I have seen many shooters use the light to point to where they want someone to go. You have control; tell them to move until you tell them to stop, move back or forward, etc. with the light still on their face. If the threat is not compliant and moves to attack, light off and move. Your vision may be hindered with the light off, but they will be functionally blind from the beam being directly in their eyes. You can move to a 90 degree position, to the nearest cover/concealment or in any direction that clears you from their attack and reengage.
For a weapon dedicated light, light to your threat’s face for control means that your first point of aim is going to be the head (cranial vault, preferably). There is a tendency in firearms training to neglect targeting the head as often as practice is paid to the body. The head of course is a smaller point of aim, with a greater margin for error and under the stress of an actual use of force and in low light, accuracy to that small of a target area is difficult. Your own personal skill is going to be the deciding factor in how you will handle a situation such as this, and distance to the threat is going to play a part as well.
Using Your Light Effectively
Cover Comparison, photo by SD
The first and most important thing about your light is to use it only when it’s actually needed. If there is enough ambient light to navigate, the light probably isn’t needed. If there is enough light to search, the light probably isn’t needed. Though when it comes to control, even if the previous is true, light is very important to control. When working in an environment, there are some general rules for using light to your advantage, or using it as a force multiplier to overcome natural lighting conditions that might otherwise work against you.
Having it ready
Make a habit of having your light in hand (if you choose to use a handheld) any time you have an expectation of using it. Crossing parking lots, walking doing the sidewalk, even going from your car into the house; these are some of the situations in which light can become unexpectedly needed.
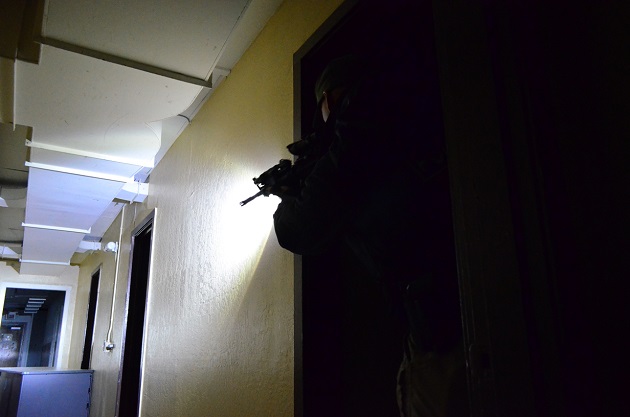
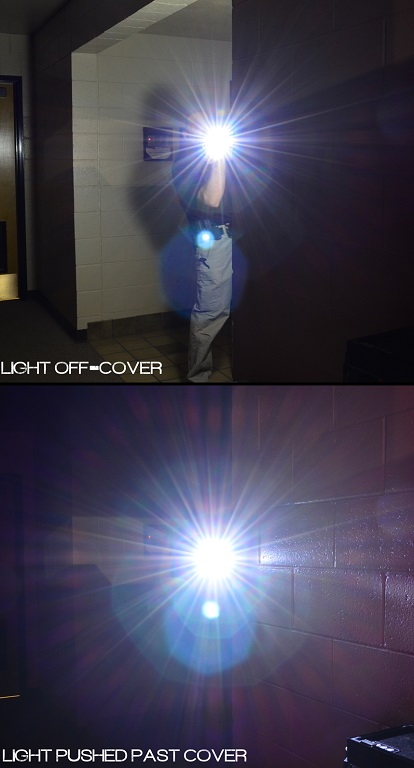
Working cover
If you need to work cover/concealment with a light, there is great benefit to pushing the light past the object you intent to use for protection or concealment. Normally we want to engage from off cover, but using this technique in low-light runs the risk of your light backsplashing off the cover, illuminating you to your threat. If your cover allows it, work the light from one side while you expose on the other, or work the light high while you go low.
Moving from light to darkness
One of the most complicated aspects of low-light is moving from a lit area into a dark area, especially in a focused point such as a doorway.  When moving through a door for example, you have two disadvantages; your eyes are not adjusted for the darkness in the room and the physical act of entering the room will momentarily silhouette you until you have moved clear of the door frame (clear from all angles, not just directly forward).
Using controlling light as you make entry, literally bathing the room in light until you have cleared the door frame helps counteract these disadvantages by illuminating the room, momentarily blinding anyone inside and lessening some of the effects of being back lit by washing out the contrast between the light and dark shape (you). This is of course not a preferable choice but it can help make the best of a bad situation. Of course you can make entry dark then illuminate once inside, weighting the risks of the momentary silhouette in the door over the use of a light that may attract attention to the door when there was none previously. My suggestion is know both techniques and apply either as the situation calls for.

Light to Darkness Entry, photo by SD
Fighting light blindness
The only technique you will have at your disposal if you are blinded by a directed light in low-light is to use your brightest light setting to project light back. It’s somewhat uncommon for the bad guys to use high power flashlights, but it isn’t unheard of. If your low-light adjusted vision is flared by a light, it is immediately overcome by illuminating where you want to look and helps to counteract the effects of flash blindness. If the light you are using happens to have more brightness and throw than the light you are up against, it can help wash out some of its brightness.

Light Blindness, photo by SD
No, that’s not everything.
This series is about the Fundamentals; which means it’s not even close to being all-inclusive. There are many more techniques and particulars that didn’t make it in because it would simply make the article too long and quite honestly they don’t fall into the Fundamentals category.  I think most people are aware that it’s more than just pushing a light around in the dark and if you weren’t, I hope this article has helped to open your eyes a bit. I believe low-light training is some of the most important training you can get because it gets dark for all of us.
My name is Jonathan I live in Costa Rica I would like to congragulate you for the site in my opinion is very good!
Regarding the post I aint no expert in the subject but I have some courses with gun manipulation and defensive shooting I conceal carry and Im a criminology student. You gave me some tips I didn`t think of good post I really like it, and now I know Im not the only one that take on his hand his flashlight when crossing a dark and lonely side walk – aile or when Im coming home at night I thought I was kind of paranoid lol.
Keep up the good job!!!!
I love articles about using a light, i know people that think just turning a flashlight on is the only thing a flashlight is for
I read pretty much every article on using a light that I can find
Thanks
Probably a controversial view but have any of you considered using airsoft as a training tool for low light tactical situations. We regularly frequent cqb sites where a large parts are of zero light conditions and have logged extensive hours of training in low/zero light conditions. I don’t want to for a moment say that airsoft would prepare you completely for the rigors of a high stess environment but it does allow you to train tactically against armed opponents in a non lethal manner. Also modern gas powered airsoft replicas can be configured with identical accessories to your real steel rifle and have correct functionality with regards to round count per mag the need to cock the rifle and release the locked bolt at the end of each mag. Whist not a replacement for live training I’m sure it could be a very valuable compliment.
Very interesting! Thank you! One way of reducing your light projection is to cup the flashlight with your hand. This allows a small light to seep through your fingers. It comes in handy when you are trying to remain concealed.